My Handicraft Space
This is where I share my handmade creations — from crochet and origami to sketches and other art. It's my cozy corner to post works-in-progress, finished/unfinished projects, and things that bring me joy.
> Death Note Tote Bag
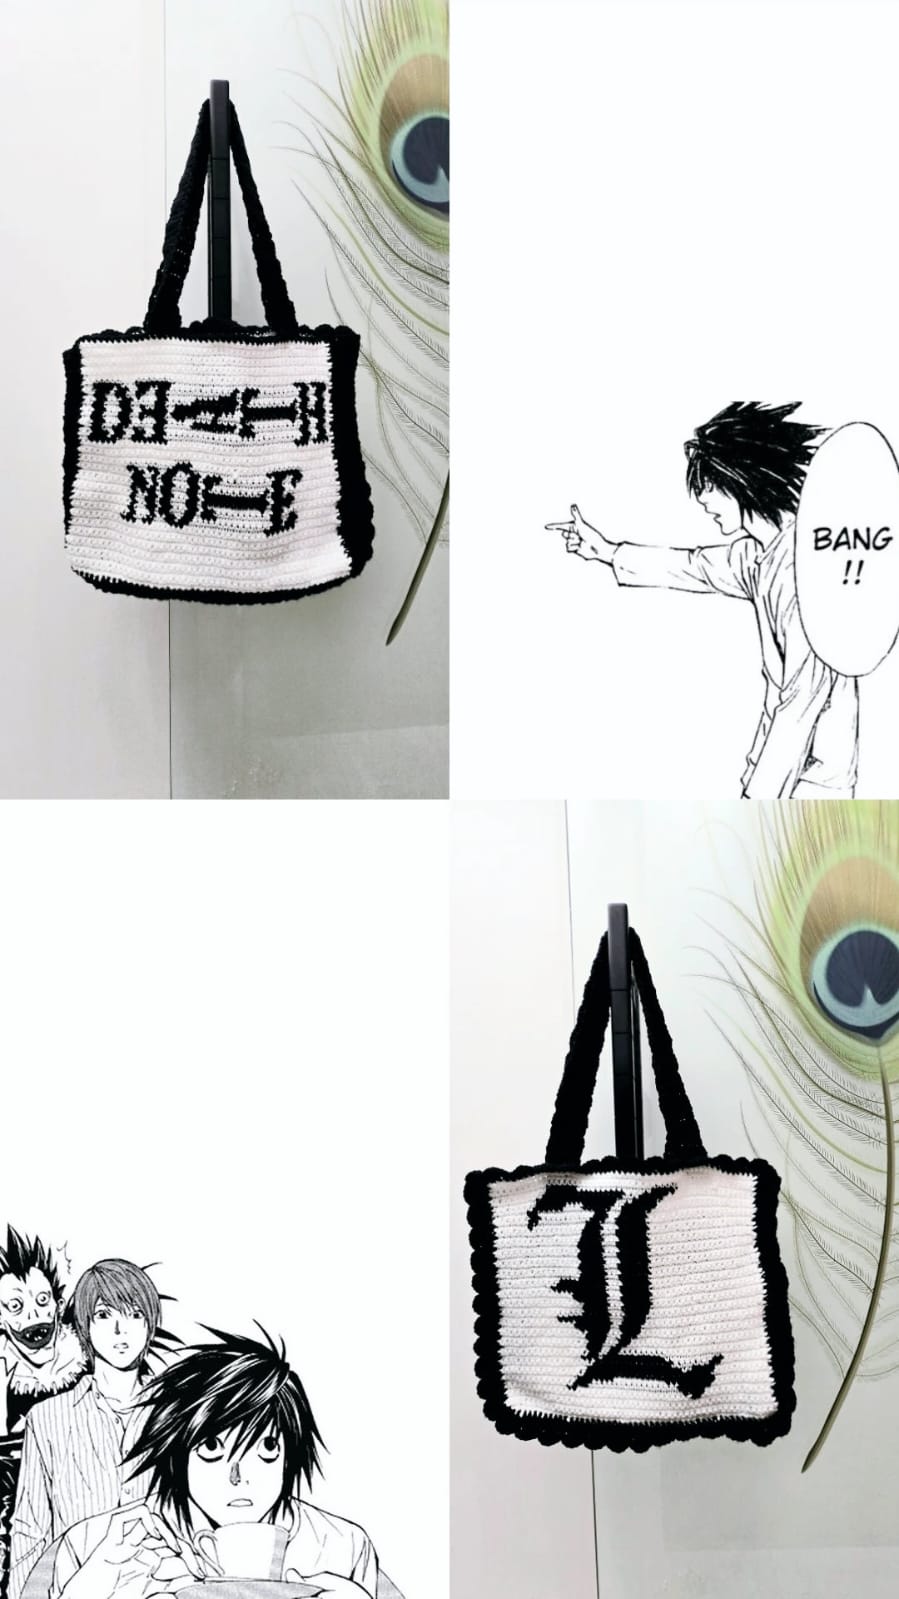
This is again my own pattern.
One thing I noticed about myself is that I LOVE tapestry crochet. Initially, I hated it but I love the work you have to put into it.
I love the process, its structure and ofcourse, the end result too.
Pattern:
Terms used: ch: chain, sc: single crochet, dc: double crochet, ldc: linked double crochet, slst: slip stitch
The Two Panels :-
- I created a pixel art grid on stitchfiddle.com and ran with it.
- I crocheted a 50x50 sc panel for the bag
The Straps and The Joiner part of the bag(i.e the one which gives the bag more space):-
- Used ldc to crocheted the whole length of the bag for the body joiner part
- Again, used ldc to make 2 straps for the bag
Stitching :-
- Crochet the body joiner to one of the panels using sc.
- Then, turn the project to the opposite side and crochet the next panel to this.
- Crochet the border now. (See: The Border section below)
- Next, sc the straps to the bottom of the border.
The Border :-
- I only crocheted a scallop border around the L symbol panel because I ran out of yarn lol.
- First sc around both the panels, then for the scalloped edging: sc in one, skip, dc 5 in the same st, skip st, sc, skip and repeat
You now have a Death Note themed Tote Bag YAY!!
> Spiderman Themed Sweater
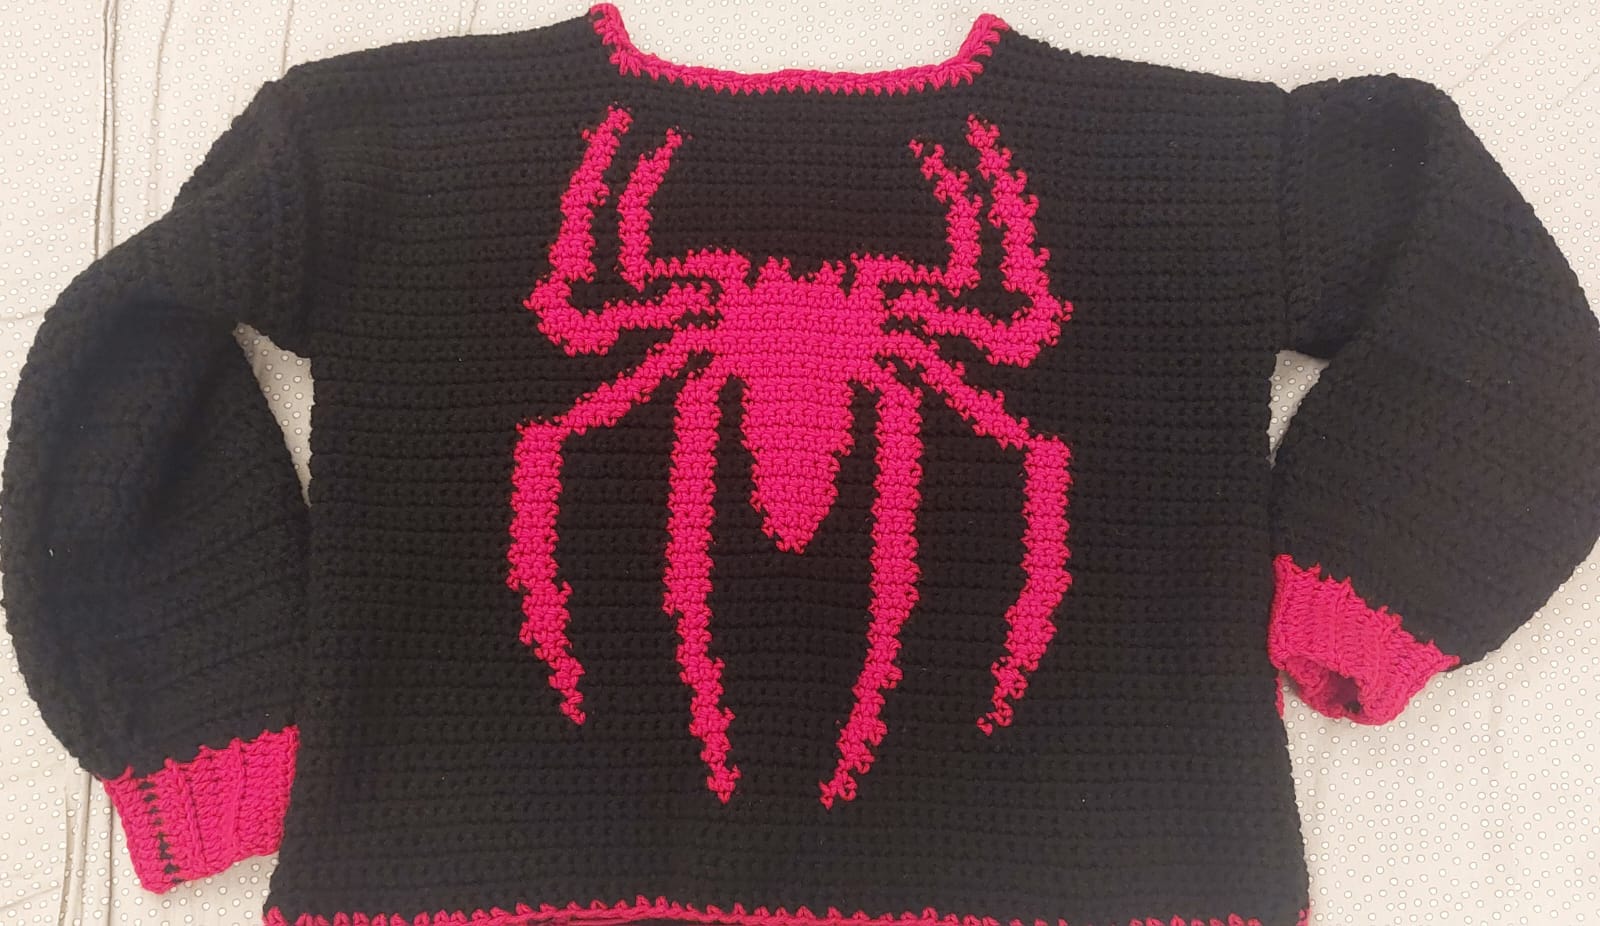

This was my first planned out crochet project that I made without following any online pattern. So, I am incredibly proud of myself for it.
I designed the pattern, selected the yarn and kept it ready days ahead of the beginning, which is unusual behaviour for me.
Pattern:
Terms used: ch: chain, sc: single crochet, hdc: half double crochet, dc: double crochet, slst: slip stitch
I used weight 4 yarn and a 4mm hook. Colors: Red and Black
Front panel (the spider panel) :-
- I created a pixel art grid on stitchfiddle.com of the spider that I wanted. There were already available ones on pinterest but they weren't available for the length that I wanted.
- Using the pattern, I crocheted (tapestry crochet NOT intersia) a 70x70 sc panel.
- For the shoulder/neck parts of the sweater, I stopped crocheting the entire row at row 65 and only did 24 stitches from each side
Backpanel (spiderweb) :-
- I did the same steps as the frontpanel except ofcourse, the design was different
Sleeves :-
- Ribbing: ch 11, then hdc in every st starting from the 2nd st from the hook. Do this for 14 rounds then slst the ribbing together.
- Sleeve: For every hdc row, insert 3 dc. I got 42 dc. Continue crocheting rows till you get the length of the sleeve you want.
Stitching (I messed this up so many times ugh) :-
- Stitch/Slst the shoulder parts of the 2 panels together, make sure it's the wrong side.
- Then, stitch each sleeve to each side of the sweater.
- Finally, fold the sweater and start slst-ing the two panels from the bottom and go up the sleeve.
In hindsight, I could and should have used a tutorial before freehanding the stitching but it worked out well in the end so its fine (no i didn't break my back and fingers in the process, don't be ridiculous)